The original of this recipe as far as I've been able to track it is to be found at
but it's been through a change or two on the way here. My original source did not specify a baking temperature, so I settled on 210C with my fingers crossed. The original, when I found it, used 230-250C but I am well satisfied with my version.
[NB You may need to check the accuracy of your thermometer - or I may need to, A friend of mine who followed the recipe closely produced several heavy, unappetising loaves that served only for bird tucker in the garden. When we checked everything out in my kitchen together, she noticed that my pots, lightly wiped with oil, were smoking when I removed the lids to place the raw dough inside. Her pots were nowhere near smoking when her oven said they were at the same temperature. Not billowing clouds of black but medium grey smoke from the heated oil wipe. Owners of fan ovens may also need to vary their practice.]
If you're researching this subject, check out the Doris Grant recipe, the Ballymaloe Brown Bread recipe, and the King Alfred Flour no-knead recipe. They all have a family likeness which may stimulate you to experiment a little for yourself, and they have each contributed something to my breadmaking style.
You will need
Large mixing bowl
Plastic container with lid
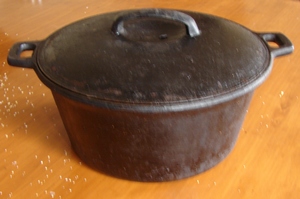
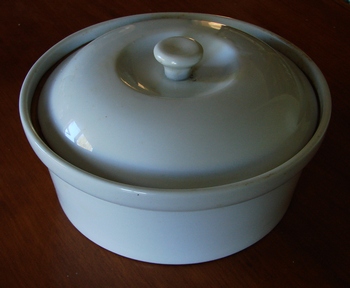
A dutch oven or cast iron saucepan (or suitable pottery or pyrex casserole)
1 cotton tea towel
Coarse cornmeal/sesame seed/sunflower seed/rolled oats
...............................
Flour: Three cups. (see below)
Yeast: For a full flavoured slow-fermenting bread, use 1/4 - 1/2 teaspoon, and ferment over 20 hours or so - a bit less in summer, more in winter.
(For a shorter fermenting time, e.g., overnight, or if the weather is becoming colder, you can increase the yeast component to 1 or 1.5 teaspoons, with a slight loss of flavour development. I use active dried yeast granules - instant yeast - by themselves, without any chemical "enhancers", and I don't start them first, just toss the granules into the flour mix. If you're baking regularly, you can generally buy a vacuum-packed brick of yeast at Bin Inn, Bulk Barn or the like, and store it in the fridge in small sealed jars.)
Salt: 2 level teaspoons or a touch less. Some people prefer to use sea salt, or rock salt, or uniodised salt. This is fine but the typically larger granules of these do not disperse in the mix as easily and may inhibit fermentation. I suggest that they be dissolved in a little water beforehand.
Either: Warm water or Warm water and milk: 1.5 - 1.75 cups
(Flour varies in its moisture content. You want a wettish dough that comes away from the edge of the bowl when you mix it, and together enough to grab with one hand when you transfer it to the rising bowl.)
OR: Warm water: 1 cup and kefir or plain unsweetened yoghurt 1 cup (Using kefir or yoghurt produces a softer crumb)
I have also substituted home-brewed stout or beer for the water component. Flavour becomes slightly more caramelly.)
Molasses: 1-2 teaspoons (optional - for added "dark" flavour. Not needed for fermentation.)
Method
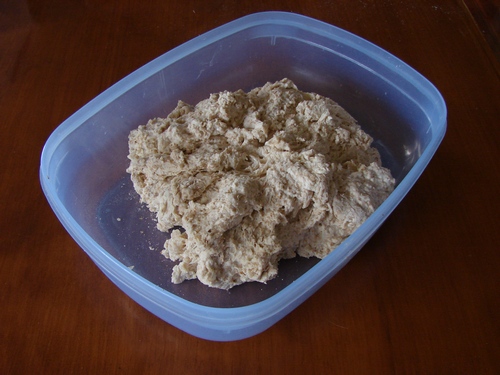
Combine flour, yeast, salt, (molasses,) and liquid in mixing bowl until just mixed - a little like preparing a scone dough. Sifting the flour can be a good idea to make sure there are no solid lumps of any kind.
Fermenting time:
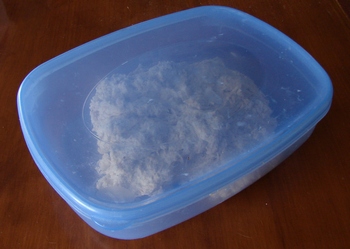
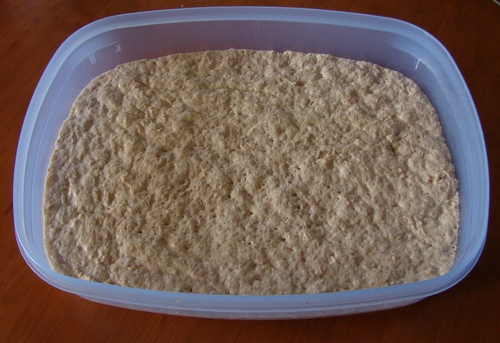
For minimal yeast and maximal natural flavour, ferment the dough for about 20 hours. I have found the best way to ferment the bread over a prolonged rising is to place the dough in a 5 or 6 litre lidded plastic container. This keeps out visiting insects etc and prevents the surface of the bread from drying out.
In summer, this container sits on the kitchen bench overnight. In winter, it is placed beside the dying fire in the lounge for a bit of extra warmth.
For overnight rising increase the yeast to 1-2 teaspoonfuls, and ferment in the plastic container as described above. The addition of a little molasses will provide a useful flavour variant, and decrease rising time.
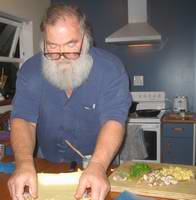
Turn out onto a well-floured surface - use a rubber spatula to cleanly remove the risen dough- and bring the outside of the dough towards the top, folding it up and onto the sticky top so that a rough flour-covered ball eventuates. Handle lightly. We are not knocking the bread down or kneading it.
Place dough on a teatowel dusted with coarse cornmeal or sesame seeds, or sunflower seeds or rolled oats.
Fold the teatowel over the loaf while it rises for an hour or so. In summer, you can begin heating the dutch oven immediately. In winter, wait for 30 -60 minutes or so to give the dough a little extra rising beforehand.
Preheat oven and cast iron pot (or casserole or pyrex dish) together to 210C. Remember to oil the inside of the pot first with a teaspoon or so of oil and a paper towel.
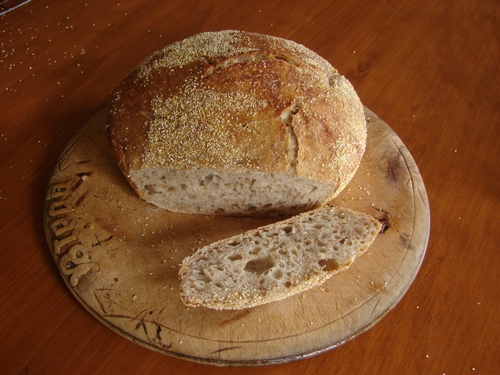
Remove heated dutch oven or lidded casserole from oven and place on a board. Carefully lift risen loaf on its towel and gently tip it into the dutch oven, cornmeal side up. Tidy around the edges with a knife if any has stuck to the side - you get better at tipping it with practice. Place lid on saucepan, return it to the oven and cook with the lid on for 30 minutes. Sweep spilled cornmeal from the floor. Place tea towel handy for removing hot lid in 30 minutes.
Remove lid and cook for another 15 minutes with lid off. If you are using molasses, you may find the bottom and perimeter crust becomes rather more black than you like as the sugar caramelises. If it does, reduce cooking time by a few minutes next time.
Run a knife around the outside if necessary to loosen the loaf and turn it out onto a rack to dry. Check that the underside sounds hollow when tapped, but I've never had a problem. Allow to cool before sampling.
Flour
Lots of fun to be had here. You can start with a standard three cups of Hi-Grade flour. (Hi-grade flour contains extra gluten - generally used for bread and fruitcakes - where plain flour is used for biscuits and cakes. Don't know for sure but I imagine it is the same as the "bread flour" specified in some overseas recipes.) From here on it's all yours.
- You can substitute a cup of wholemeal for one of the cups of hi-grade flour.
- You can use half and half rye and wholemeal for the third cup - with or without a teaspoon of lightly bruised caraway seeds.
...and so forth
Yeast
Modern yeast varieties do not need sugar to do their stuff. There's plenty of food for the yeast in the flour. The longer the yeast has to work, the more pronounced the flavour that results, so starting with a small amount of yeast and leaving for 18- 24 hours is fine. You can also use a larger amount - 1.5 teaspoonfuls, say - and leave the dough overnight for baking next morning